DIY Pallet Snowman: Turn Your Backyard Into A Winter Wonderland
Ever wondered how to create a stunning DIY pallet snowman that will make your neighbors green with envy? Well, you’re in the right place, buddy! This winter, why not turn your old wooden pallets into a charming snowman that’s both eco-friendly and budget-friendly? Whether you’re a craft enthusiast or just looking for a fun weekend project, this guide will walk you through every step of the process. So, grab your tools, roll up your sleeves, and let’s get started!
There’s something magical about snowmen, isn’t there? They remind us of cozy winters, hot cocoa, and family time. But what if you live in a place where snow is as rare as a unicorn? Fear not! With a bit of creativity and some wooden pallets, you can still bring the charm of a snowman to your doorstep. Plus, it’s a great way to recycle those old pallets gathering dust in your garage.
DIY projects have become increasingly popular in recent years, and for good reason. They’re not only cost-effective but also allow you to express your creativity. And when it comes to DIY pallet snowmen, the possibilities are endless. From rustic designs to modern twists, you can customize your snowman to match your style and personality. So, are you ready to dive into this snowy adventure?
- Movierulz Kannada Risks Legal Ways To Watch Kannada Movies 2024
- Did Trump Play Guitar The Mystery Amp The Music World Reacts
Why DIY Pallet Snowmen Are the Perfect Winter Project
Let’s face it—winter can get pretty boring, especially if you’re stuck indoors. But with a DIY pallet snowman, you can add a touch of magic to your outdoor space. Not only does it brighten up your garden, but it also serves as a conversation starter for visitors. Plus, it’s an excellent way to teach kids about recycling and sustainability.
Here are a few reasons why DIY pallet snowmen are the perfect winter project:
- Eco-Friendly: By repurposing old pallets, you’re reducing waste and giving new life to discarded materials.
- Cost-Effective: You don’t need to spend a fortune on expensive materials. Most of the supplies can be found around your home.
- Customizable: Whether you prefer a traditional or quirky snowman, the design is entirely up to you.
- Fun for the Whole Family: Get the kids involved and make it a bonding activity. It’s a great way to spend quality time together.
So, whether you’re a seasoned DIYer or a complete novice, creating a pallet snowman is a project that anyone can tackle. And trust me, the end result is worth every bit of effort!
- Movie Reviews More Find What You Seek Moviesrulz Tips
- Free Movie Streaming Guide Find Legal Sites Alternatives
What You’ll Need to Create Your DIY Pallet Snowman
Before we dive into the step-by-step guide, let’s talk about the materials you’ll need. Don’t worry, most of these items are probably already lying around your house. If not, you can easily find them at your local hardware store or online.
Materials:
- Wooden Pallets: These will form the body of your snowman. You’ll need at least two pallets for the best results.
- Sandpaper: To smooth out any rough edges on the pallets.
- Paint: White paint for the snowman’s body and black paint for the eyes and mouth. You can also use other colors for accessories like scarves or hats.
- Paintbrushes: Various sizes for different details.
- Screws and Nails: To assemble the pallets together.
- Twine or Rope: For creating the snowman’s scarf.
- Buttons: To add a personal touch to your snowman’s outfit.
- Hot Glue Gun: For attaching smaller decorations.
Now that you have your materials ready, it’s time to move on to the fun part—building your snowman!
Step-by-Step Guide to Making a DIY Pallet Snowman
This is where the magic happens, folks! Follow these simple steps, and you’ll have your very own pallet snowman in no time.
Step 1: Prepare Your Pallets
First things first, you need to prepare your pallets. Use sandpaper to smooth out any rough edges or splinters. You don’t want anyone getting hurt while admiring your masterpiece, right?
Step 2: Paint the Pallets
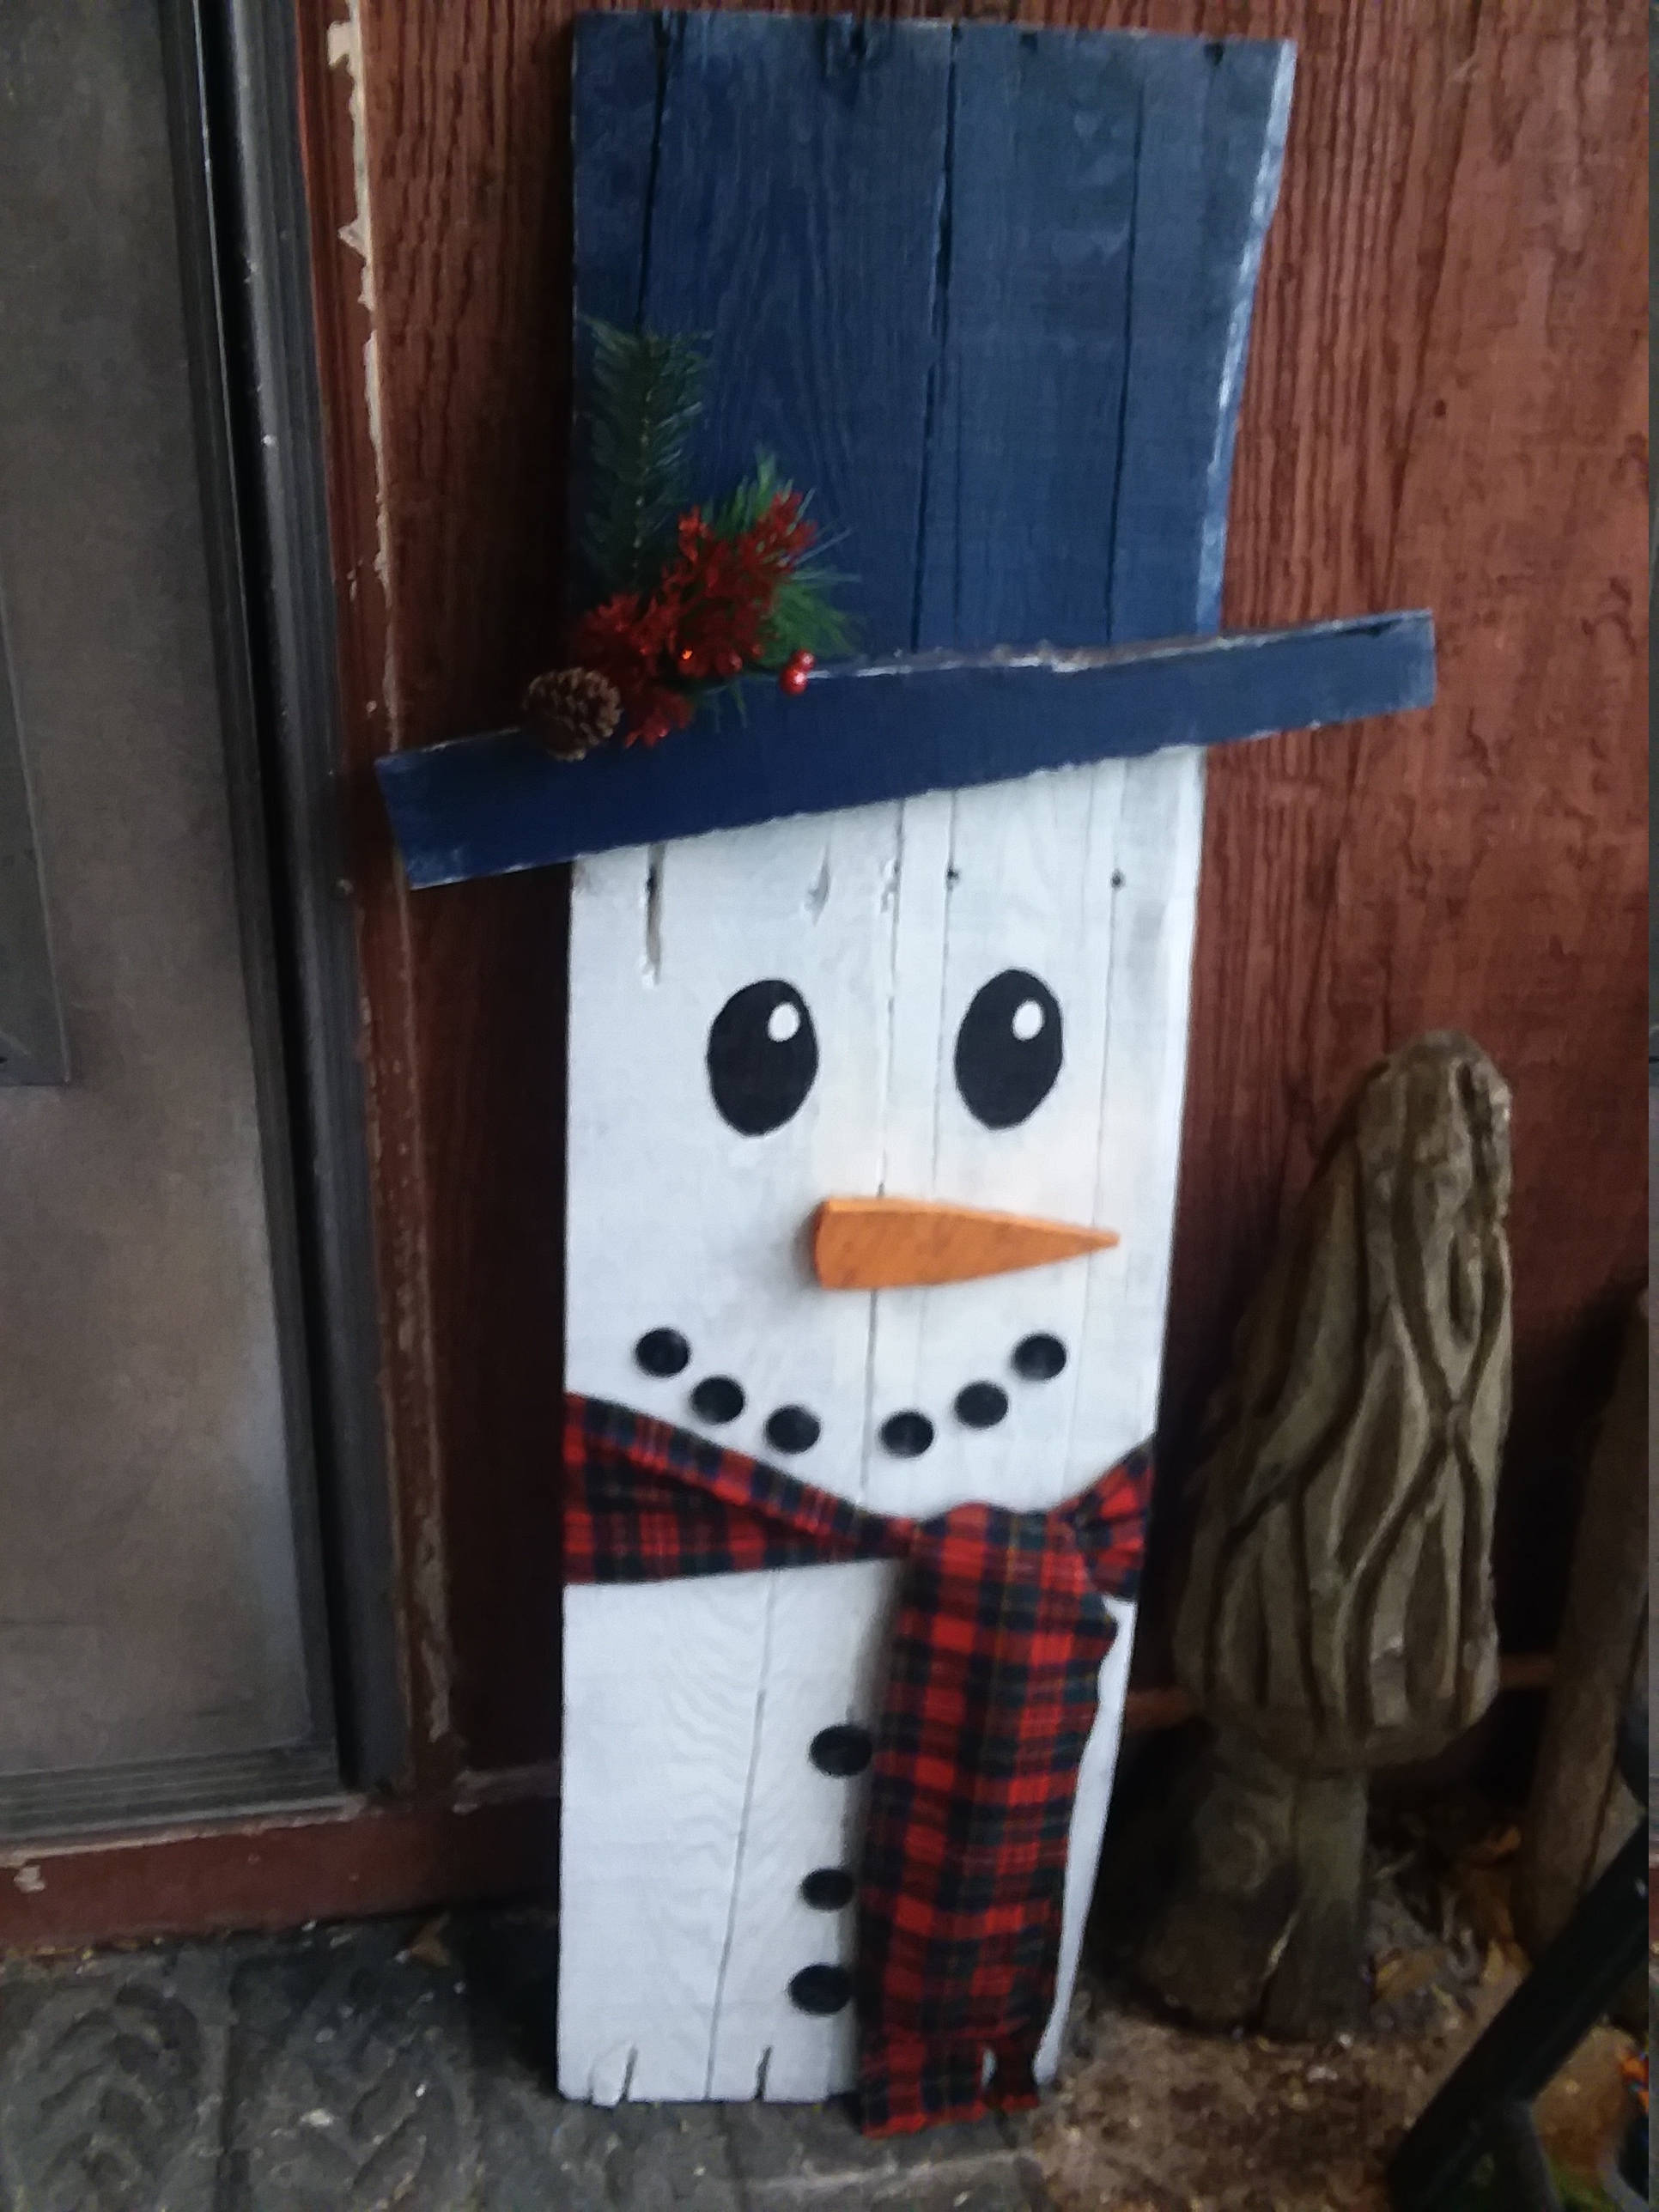
Once your pallets are smooth, it’s time to give them a fresh coat of white paint. This will serve as the snowman’s body. Don’t forget to paint the back as well, in case you decide to display it from all angles.
Step 3: Assemble the Pallets
Now it’s time to assemble the pallets. Use screws and nails to attach the pallets together. You’ll want to stack them in a way that resembles a snowman’s body—larger at the bottom, medium in the middle, and small at the top.
Step 4: Add the Details
With the structure in place, it’s time to add the finishing touches. Use black paint to create the snowman’s eyes and mouth. You can also add buttons down the middle for that classic snowman look.
Step 5: Decorate Your Snowman
This is where you can really let your creativity shine. Use twine or rope to create a scarf, and add a hat or even a carrot nose if you’re feeling adventurous. The possibilities are endless!
And there you have it—a beautiful DIY pallet snowman ready to brighten up your winter days!
DIY Pallet Snowman Variations: Get Creative!
While the basic pallet snowman is adorable, why not experiment with different designs? Here are a few ideas to inspire you:
- Rustic Charm: Use natural materials like twigs and pinecones to give your snowman a rustic look.
- Modern Twist: Add metallic accents or LED lights to give your snowman a contemporary vibe.
- Festive Flair: Incorporate holiday colors like red and green to make your snowman holiday-ready.
- Family Fun: Create a whole family of snowmen using pallets of different sizes.
Remember, the key to a successful DIY project is to have fun and let your imagination run wild!
Benefits of DIY Projects Like Pallet Snowmen
DIY projects like pallet snowmen offer more than just aesthetic appeal. They come with a host of benefits that make them worthwhile:
- Environmental Impact: By repurposing old materials, you’re reducing your carbon footprint.
- Cost Savings: DIY projects are often much cheaper than buying ready-made decorations.
- Personal Satisfaction: There’s nothing quite like the pride of creating something with your own hands.
- Family Bonding: DIY projects are a great way to spend quality time with your loved ones.
So, not only are you getting a beautiful decoration, but you’re also contributing to a better planet and strengthening your family bonds. Win-win, right?
Common Mistakes to Avoid When Making a DIY Pallet Snowman
While DIY projects are fun, they can also be frustrating if things don’t go as planned. Here are a few common mistakes to avoid:
- Skipping the Sanding: Failing to sand your pallets can result in splinters and injuries.
- Using Low-Quality Paint: Cheaper paints may not adhere well to the wood, leading to chipping and peeling.
- Not Securing the Pallets Properly: If the pallets aren’t securely attached, your snowman may fall apart.
- Overloading with Decorations: While decorations are fun, too many can make your snowman look cluttered.
By avoiding these pitfalls, you’ll ensure that your snowman turns out as perfect as possible!
Tips and Tricks for a Flawless DIY Pallet Snowman
Here are a few tips and tricks to help you create a flawless DIY pallet snowman:
- Plan Ahead: Sketch out your design before you start building. This will help you visualize the end result.
- Use High-Quality Materials: Invest in good-quality paint and adhesives for a longer-lasting snowman.
- Work in a Well-Ventilated Area: Especially when painting, make sure you’re in a well-ventilated space to avoid inhaling fumes.
- Take Your Time: Rushing through the project can lead to mistakes. Take your time and enjoy the process.
With these tips, you’ll be well on your way to creating a snowman that’s the envy of the neighborhood!
DIY Pallet Snowman Ideas for Every Skill Level
Not everyone is a seasoned DIYer, and that’s okay! Here are a few ideas for pallet snowmen that cater to different skill levels:
Beginner-Friendly:
- Basic Snowman: Stick to the basics with a simple white body, black eyes, and a scarf.
Intermediate:
- Decorated Snowman: Add accessories like hats, gloves, and buttons for a more detailed look.
Advanced:
- Animated Snowman: Incorporate moving parts or LED lights for a truly impressive creation.
No matter your skill level, there’s a pallet snowman design that’s perfect for you!
Conclusion: Bring the Magic of Winter to Your Home
Creating a DIY pallet snowman is a fun and rewarding project that anyone can enjoy. Not only does it add a touch of magic to your outdoor space, but it also promotes sustainability and creativity. By following the steps outlined in this guide, you’ll be able to craft a snowman that’s as unique as you are.
So, what are you waiting for? Grab your tools and start building your very own pallet snowman today! And don’t forget to share your masterpiece with the world. Who knows, you might just inspire others to join in on the fun. Happy crafting, and may your winter be filled with joy and creativity!
Table of Contents
- Why DIY Pallet Snowmen Are the Perfect Winter Project
- What You’ll Need to Create Your DIY Pallet Snowman
- Step-by-Step Guide to Making a DIY Pallet Snowman
- DIY Pallet Snowman Variations: Get Creative!
- Benefits of DIY Projects Like Pallet Snowmen
- Common Mistakes to Avoid When Making a DIY Pallet Snowman
- Tips and Tricks for a Flawless DIY Pallet Snowman
- DIY Pallet Snowman Ideas for Every Skill Level
- Conclusion: Bring the Magic of Winter to Your Home
- Movierulz Watch Telugu Movies Online Streaming Guide Alternatives
- Kannada Movies 2025 New Releases Watch Online Legal Options
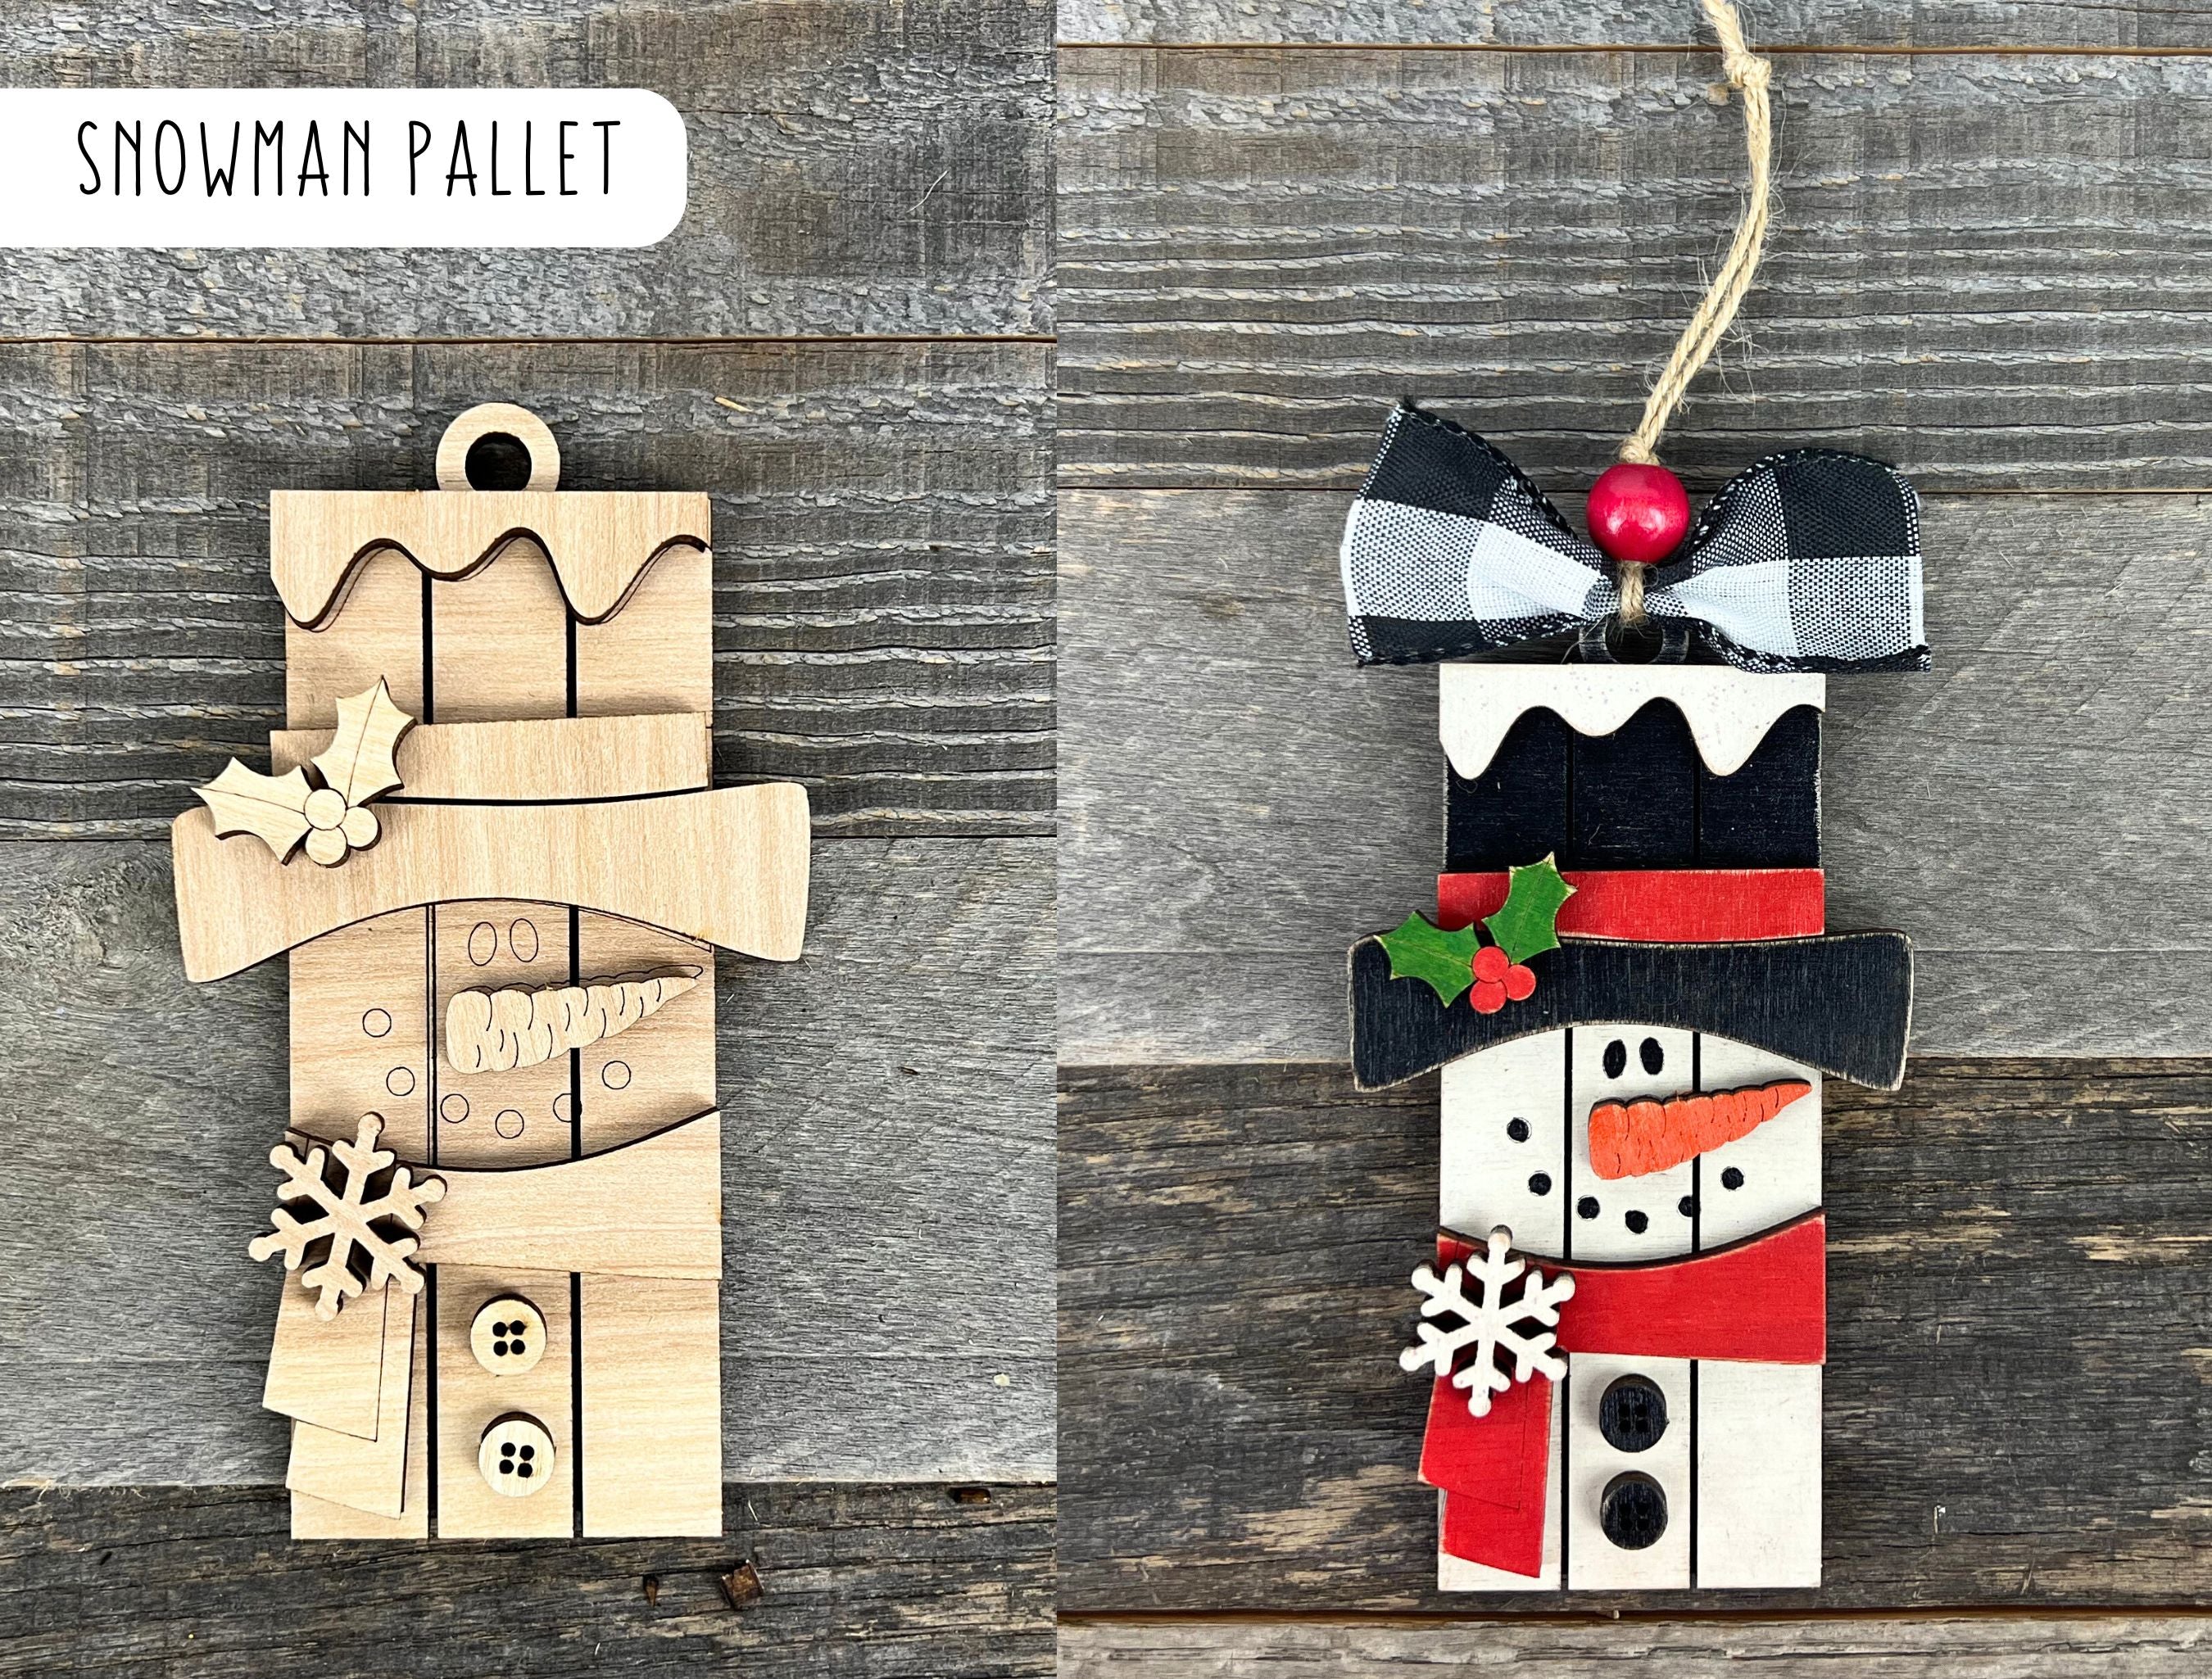
DIY Pallet Snowman Ornament Amy & Art Designs

DIY Wood Snowman
Snowman Pallet Sign Decoration Etsy
